THIS IS THE SECOND iteration of Apco’s Force, which sits above the Lift EZ in Apco’s specialist paramotor wing range. Designed to be an all-rounder it has been created with classic competition performance in mind rather than hooning round pylons; they have the NRG Pro if that’s your thang.
Design and build
Our test wing was supplied as a retail wing would be supplied, complete with Apco’s standard rucksack and accessories including a windsock, sticky cloth and spare line, plus of course the manual. I read that first.
The first thing I noticed when taking the wing out of the bag was its weight. On our scales it comes in at 5.8kg, so it’s not the lightest wing in the class but as with other Apco products it is made to stand up to its intended job. The wing itself is made from silicone-coated cloth that has its own particular feel but is proven to stand up to harsh environments and rough handling.
Although not having a sharknose, the leading edge does include six of Apco’s Hit Valves spread across the span. These are mesh-covered openings above the normal cell openings. Normally, pressure on a piece of material inside keeps them closed, but when the wing is accelerated and the stagnation point moves up they can open to improve airflow and increase pressure in the wing. It’s a technology often seen on acro wings to allow pressure to be maintained at low angles of attack.

Flexon battens help keep the leading edge open, especially on launch. At the trailing edge there aren’t any mini-ribs as has become common: rather surprising as they were first seen on Apco wings back in the 1990s.
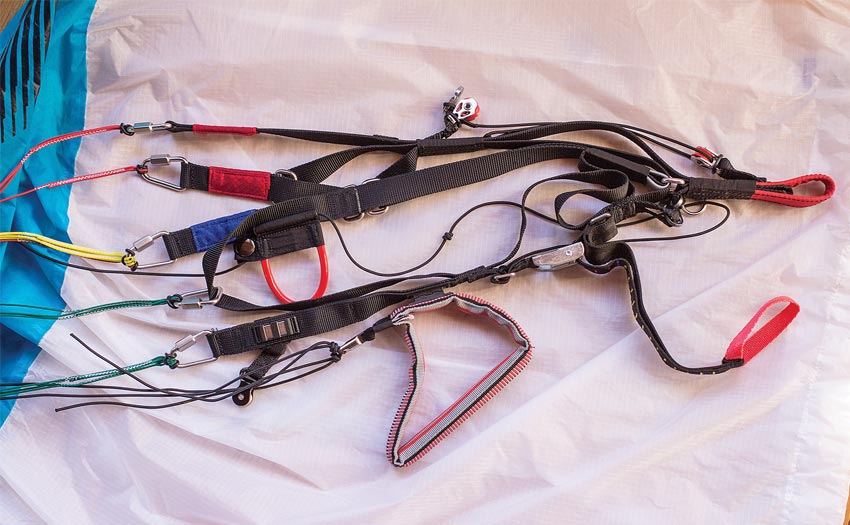
Apco use fully-sheathed lines throughout the lineset. Rather than compromise on strength and durability they have looked elsewhere to reduce drag. The wing makes use of their unique embedded hook-in points, effectively using the top gallery of lines as the hook-in point rather than tape. The company claim that by removing the tape there is significant reduction in drag. The glider uses a four-line setup with both C and D risers.
The risers themselves are fully optimised for power use rather than being reworked free-flight paraglider risers. You will find all the latest technology onboard. The speed system includes One Action Acceleration (OAA). When this is engaged – a simple case of clipping two Brummel hooks together – the speedbar applies trim and speed system together. The risers all move as you push the bar. The system uses ball bearings which keeps the bar pressure light.
If you disengage the system you can release the trimmers in the normal way; they should be released before using the speed system. The trimmers are a replaceable design, so if they get worn from use they are easy to change.

The brake system
The braking system also packs in a lot of options. Two lines come from the brake handles so you can control which part of the trailing edge you affect. Moving your hands out from your body means the whole trailing edge on one side is deflected when you apply brake. Move the brakes close to the body and only the tip is affected.
In addition there is more classic tip-steering, with a small toggle attached to the stabilo line. This is kept in place with a popper while the main brakes use magnets – something I prefer on paramotor wings as it makes it easier to stow them in flight.
The risers are fully equipped for use on high or low hangpoints. Despite all the complexity the risers are easy to use with good colour-coding of the lines and risers making it easy to grab the right ones when needed. Of course all these systems should be checked carefully in your pre-flight checks.
Launching
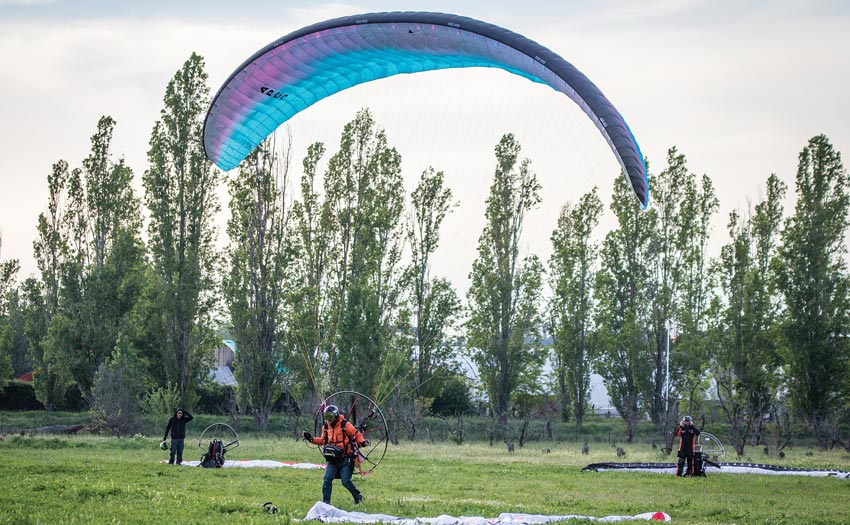
On the ground the Force II is easy to use. Forward launches work well: with a steady pull the wing rises smoothly overhead with no real tendency to overshoot. Applying some power as it comes overhead the wing quickly lifts you off the ground.
In stronger winds the wing is equally easy to use. Again a firm pull on the wing will get it climbing steadily above your head. Moving under the wing as it comes up keeps everything calm and you can feel the lift being generated. This means very few steps are needed before you are in the air.
Playing with the wing on the airfield without a harness showed just how easy it is. Once above me I found it very stable – it would happily sit there with very little brake input needed to keep it overhead. It really didn’t feel any more difficult to control than its sibling the Lift EZ.
In the air
At slow trim the wing reacts well to the brakes using a mixture of different positions. In slow trim it seems pretty undemanding to pilot, and I was very quickly happy to play with it low down. The brakes allow for exact placement of the wing.
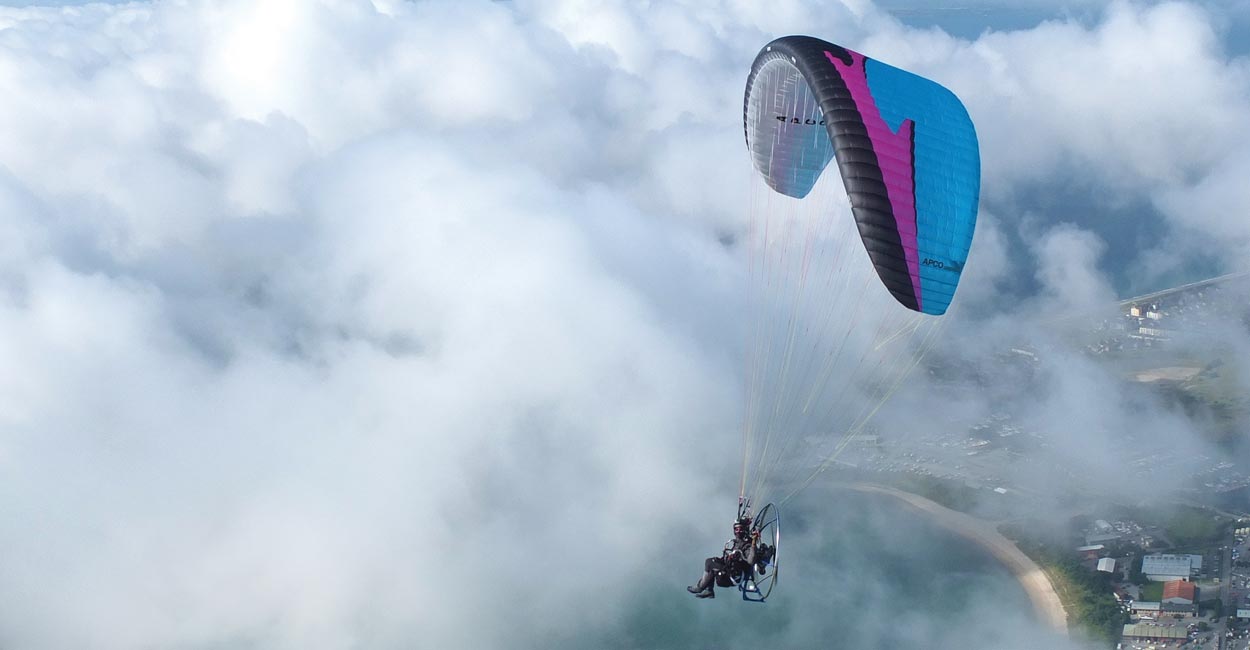
Also noticeable is the efficient lift created by the wing. I was flying it with a Parajet Zenith fitted with a Polini Thor 190 Light motor. This unit has plenty of power and I felt like I had to use very little to maintain level flight and during launches. That means less revs, less stress on your motor, lower fuel consumption and less noise – all positives in our sport.
I played with the wing’s more dynamic side using heavier brake actions to get it into a series of wingovers. The good level of control made it easy to coordinate the brake movements and keep the wing well pressurised throughout.
Spiral dives were equally easy to coordinate with no signs of sticking. Exiting, it was easy to bleed off the energy with the brakes so there were no big surges. In general I found it nicely stable in pitch with no tendency to dive forward, even in moderate turbulence.
When playing low down you have a lot of control at your disposal, with the two-dimensional brakes and the OAA. These come into full play when flying slalom, giving you full control of the wing to precisely carve round the course. This level of complexity does of course take time to master and you will need plenty of practise to discover how to get the best out of the control you have. However, I found it simple enough to play with close to the ground straight away.

Going XC
Heading off for a coastal cruising session I had the OAA disengaged so released the trimmers to their full-speed setting. Using my GPS I flew back and forth along a canal so I could work out average speeds taking ingo account the influence of the wind.
I found my figures corresponded pretty closely to Apco’s published figures. At trim I was getting a speed of around 39km/h in level flight; with the trimmers released I got a 14km/h increase in speed with an average of 53km/h in level flight. These measurements were made at about 400m above sea level as low flying isn’t allowed where I was flying. The trimmers were very easy to release and pull back on with very little pressure needed.
In paramotoring, some modern wing designs have suffered from a degree of roll oscillation, especially when flying at speed. To overcome this Apco have developed what they call the Automatic Balance System (ABS). This pulls down the tip steering as you release the trimmers, giving more stability at speed, without compromising the dynamic nature of the wing at trim speed.
There is nothing for the pilot to do as it is preset at the factory so I can’t say how much difference it makes, but what I can say is the wing cruises comfortably at fast trim and I had no oscillation problems during my time with it. You can just sit back and enjoy the scenery slipping past.
When flying with trimmers open the tip-steering toggles work effectively for course correction and are precise enough for flying close to other pilots.
The Force’s efficiency shows when cruising. It didn’t feel like I had to work the engine hard to maintain level flight with the trims released, and as a result my fuel consumption remained good.
Conclusion
The Force II is the perfect stepping stone up from the company’s Lift EZ paramotor wing. In normal flight it’s not really any more demanding than its sibling; indeed, most qualified pilots could jump straight on it and enjoy flying it.
The extra control the OAA and 2D brakes give allows you to build your wing-control skills. In the case of the Force II, that means skills that you will need to develop to fly a pylon-racing wing can be learned on the same wing you use for cross-country cruising, classic navigation and economy tasks. In short, this is an efficient all-rounder that will take just about anything you throw at it while also helping you to develop your skills.
****
Q&A: APCO’S JONATHAN COHN
Jonathan, you have been involved in the design of the Force II from the beginning. What design criteria did you have in mind when you started the project”
Well obviously we were looking for a replacement for our Force wing, which was considered by many the best all-rounder in our line. We wanted something that improved on it in all aspects of flying! So that’s what we set out to do.
All-rounder is a broad market, do you have a target pilot in mind?
It’s a reflex wing for pilots looking to move up from their first wing or even their school wing to the next level. It’s an intermediate and easy to fly, yet performs at the highest level of cross county paramotor wings.
You’ve bucked the trend and there is no sharknose or mini-ribs. Why?
In our tests we found that neither of these technologies have any advantages on a reflex profile. In fact we found a sharknose can even reduce some of the advantages of a reflex design.
And although mini-ribs may in theory help at slow speeds, we are only really worried about drag when accelerated. On a reflex profile, like the one we are using in the Force II, there is an increased pressure gradient in the boundary layer. This causes an earlier separation of the flow from the trailing edge costing a slight drag increase. That means mini-ribs would be ineffective. So there’s no point in having them.
The steering systems seem quite complex – how do you advise pilots to use the brakes? Is there any need to use the small tip-steering toggles?
The Force II has 2D-steering on the main brakes, and this allows pilots to use only the main brakes throughout the entire envelope of flight.
We recommend the tip-steering toggles on cross-country flying as they are very efficient with much lower brake pressure. Most pilots will prefer them for everything during flight, except landing or take-off.
For pilots who enjoy flying aggressively it is possible to use the main brake and tip-steering together for extremely tight handling!
What is the Automatic Balance System and how does it work?
Simply explained, during development we discovered that a very slight tip-steering application provides huge improvement in roll stability. We connected the tip-steering line to the riser in a way that acceleration (speedbar or trimmers) automatically pulls the tip-steering an amount relative to the acceleration.
Roll instability is usually induced by the engine and is aggravated in accelerated flight (by both the canopy’s angle of attack and the engine’s additional power). It therefore makes sense to use system like ABS that only affects the stability in accelerated flight, where you want the wing to have as much stability as possible to achieve the most efficient flying behaviour. At trim speed the wing stays playful and fun without ABS.
Any tips for pilots to get the best out of the wing?
Use only the speedbar (no trimmers) with the OAA system working (Brummel hooks unconnected). This will allow pilots the full range of speed using the speedbar only. The transition from trim speed to maximum speed is effortless and immediate, like on a free-flying wing, without use of trimmers!
What’s coming next from Apco?
We’re planning a new NRG Pro for slalom racing and a new NRG XC for experienced pilots who want a small, fast wing.
****
MANUFACTURER’S SPECIFICATIONS
What Apco say: “A perfect all round wing for any pilot looking for the natural choice.”
Use: General flying and classic comps
Pilot level: Intermediate pilots +
Sizes: S, M, L
Flat area (m2): 22.5, 24, 25.5
Free-flight take-off weight (kg):
70-100, 90-120, 105-140
PPG take-off weight (kg): 75-120 (140*) / 100-145 (160*) / 125-165 (185*) * higher wing loading recommended for trike use
Glider weight (kg): 5.5, 5.7, 5.9
Cells: 50, 52, 54
Flat aspect ratio: 5.58, 5.80, 6.03
Certification: DGAC + load test
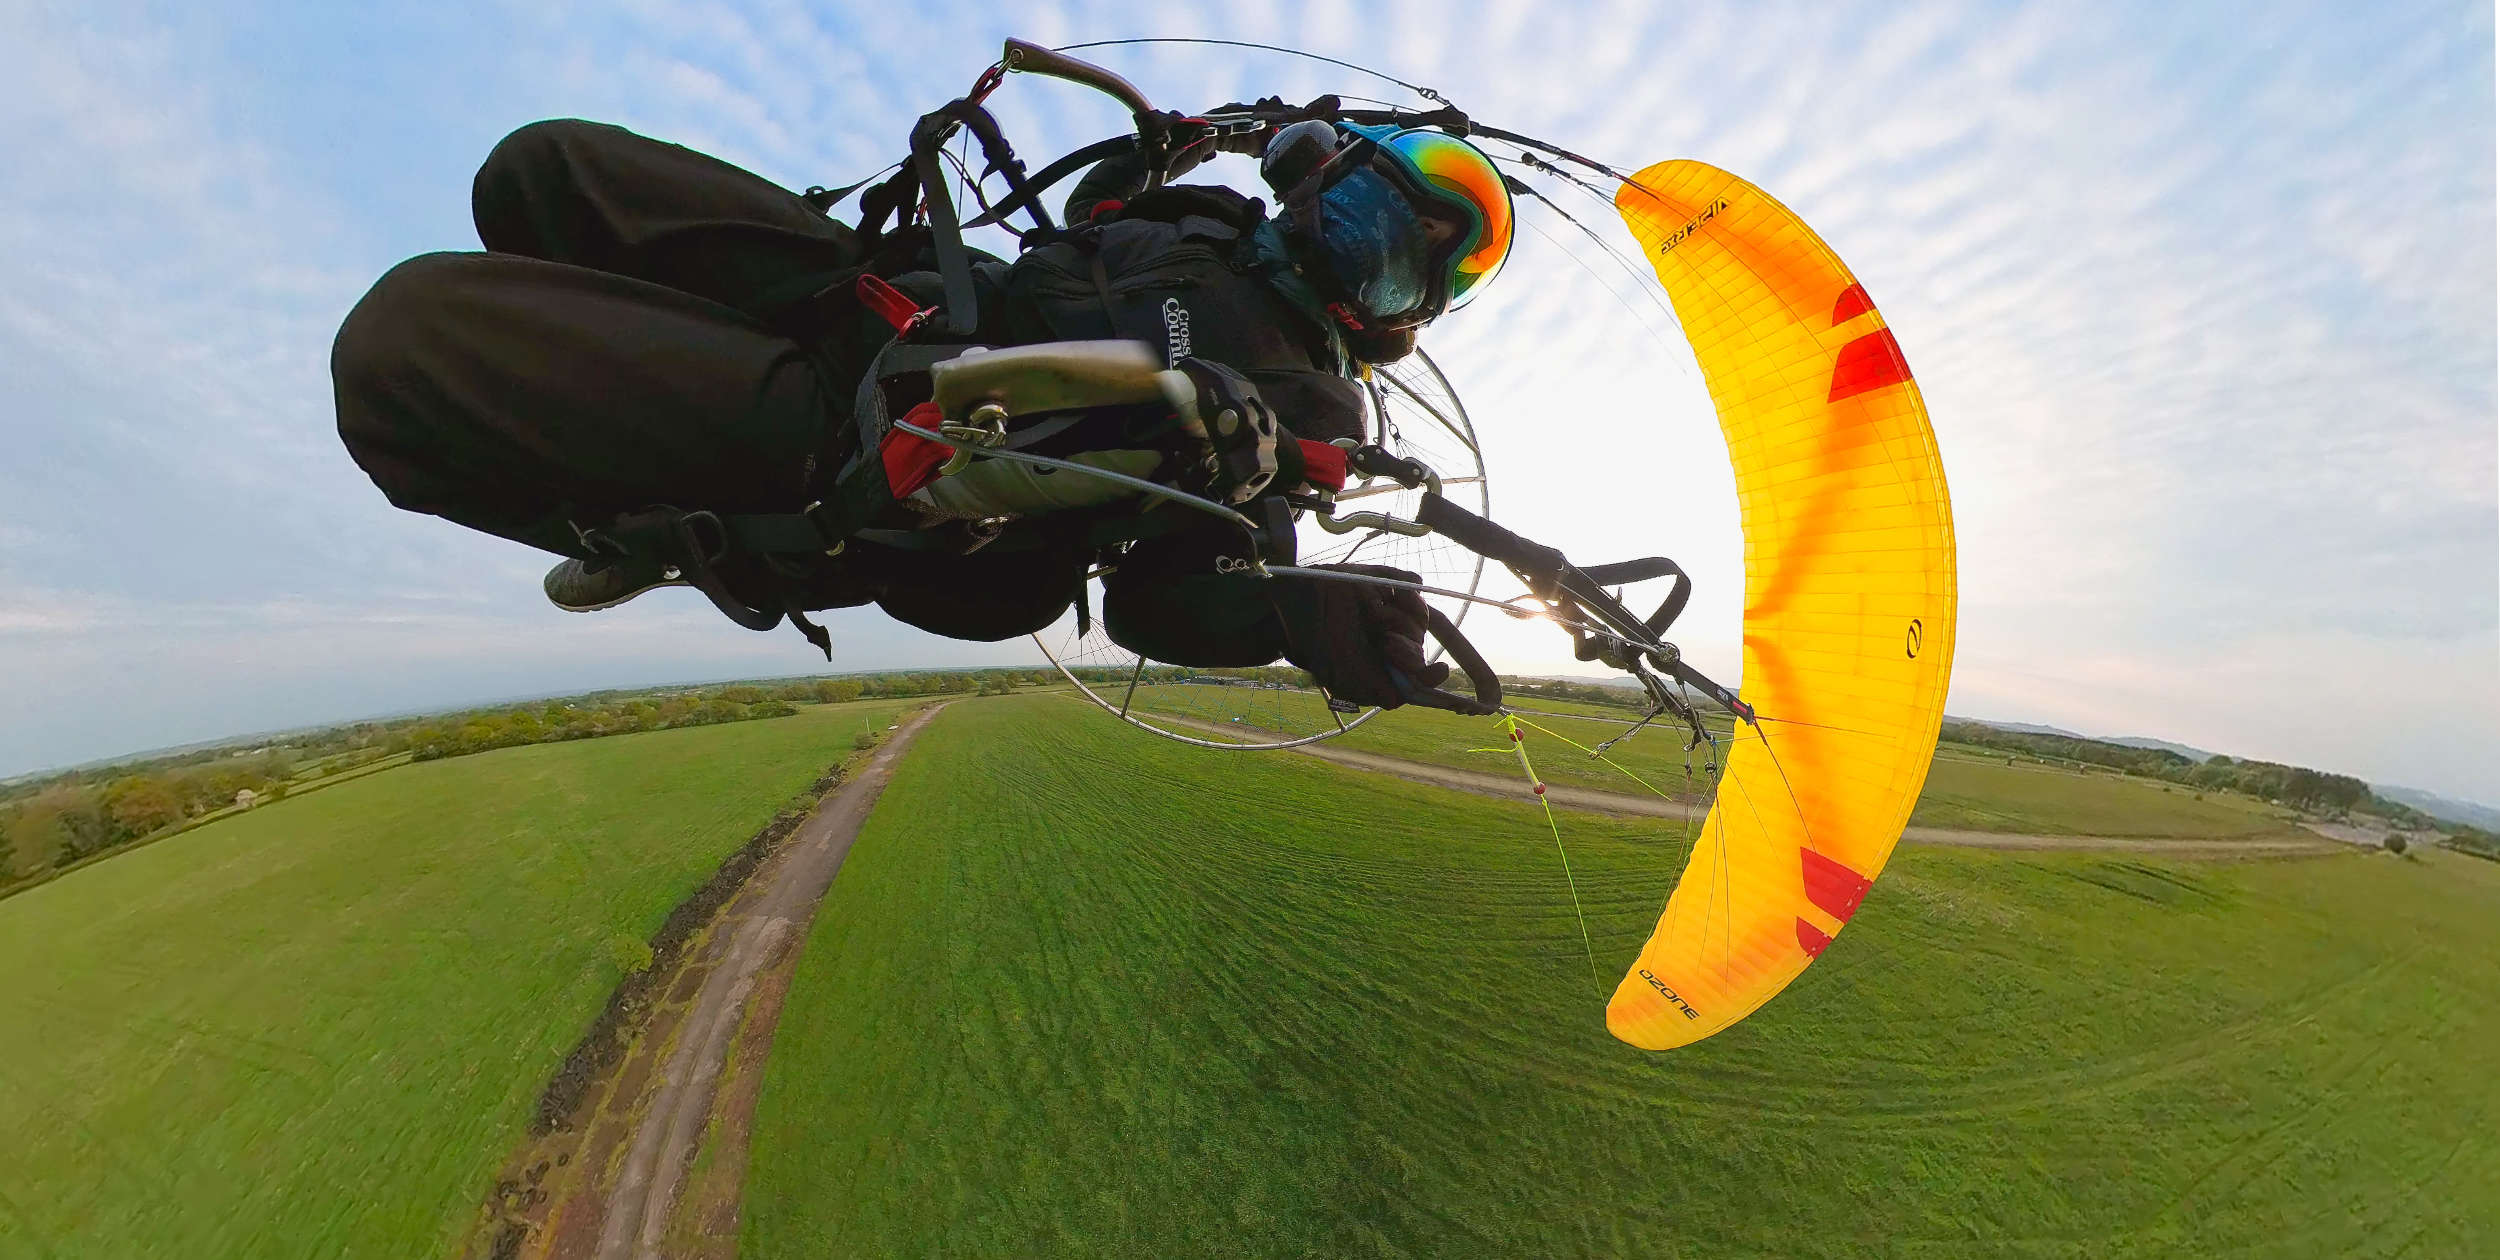
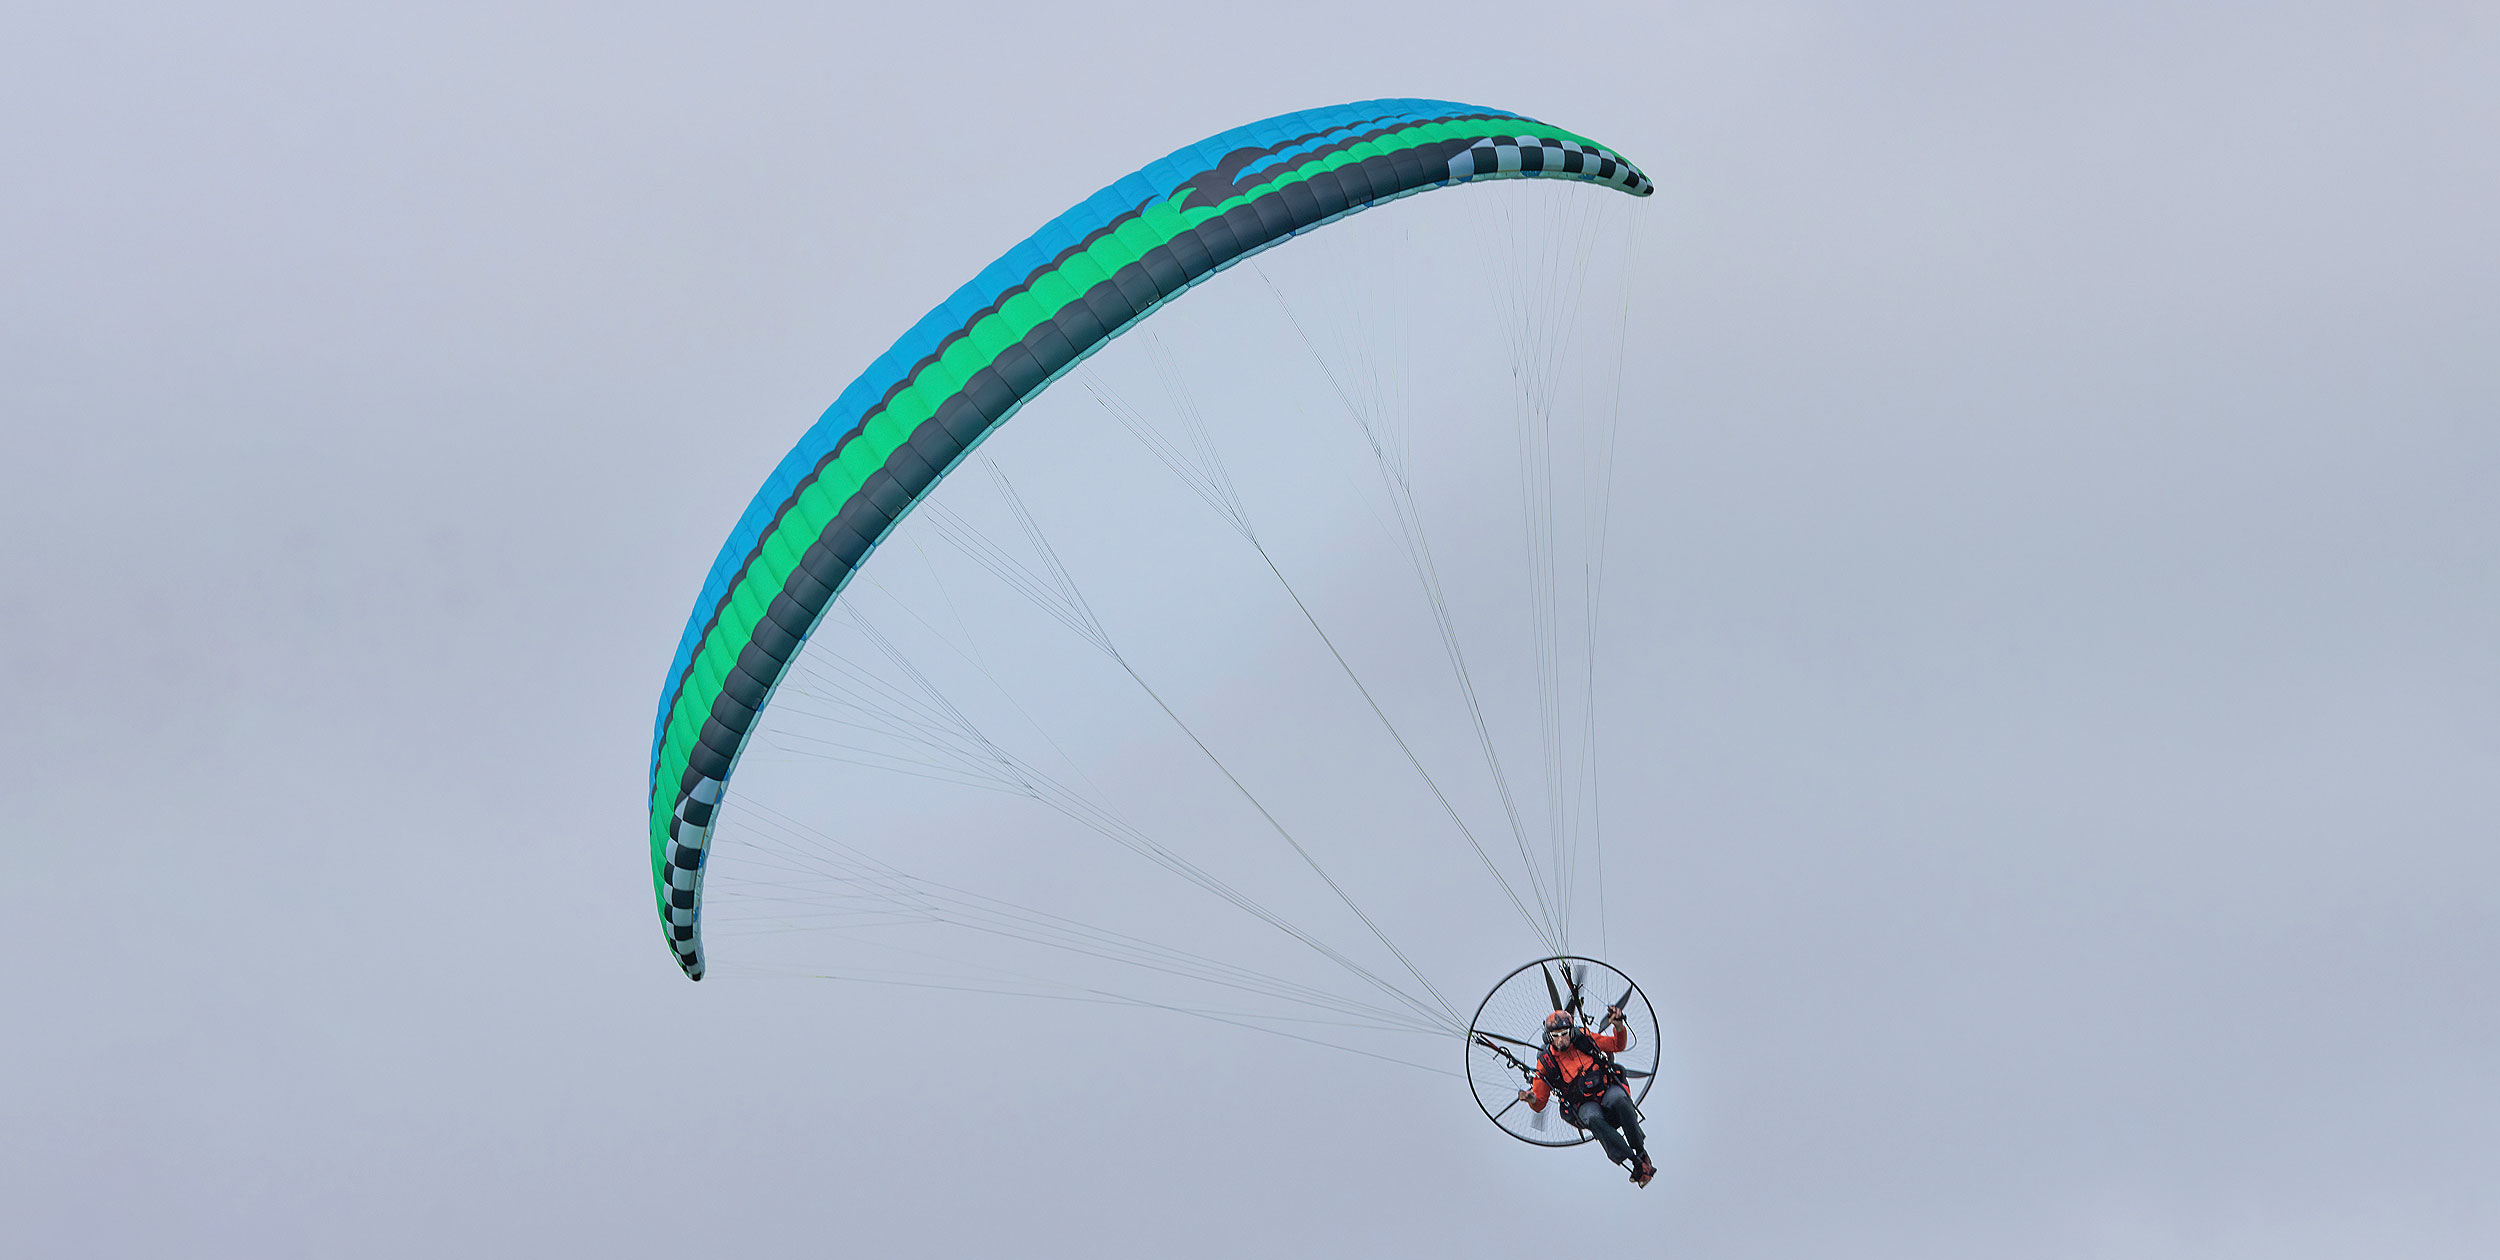
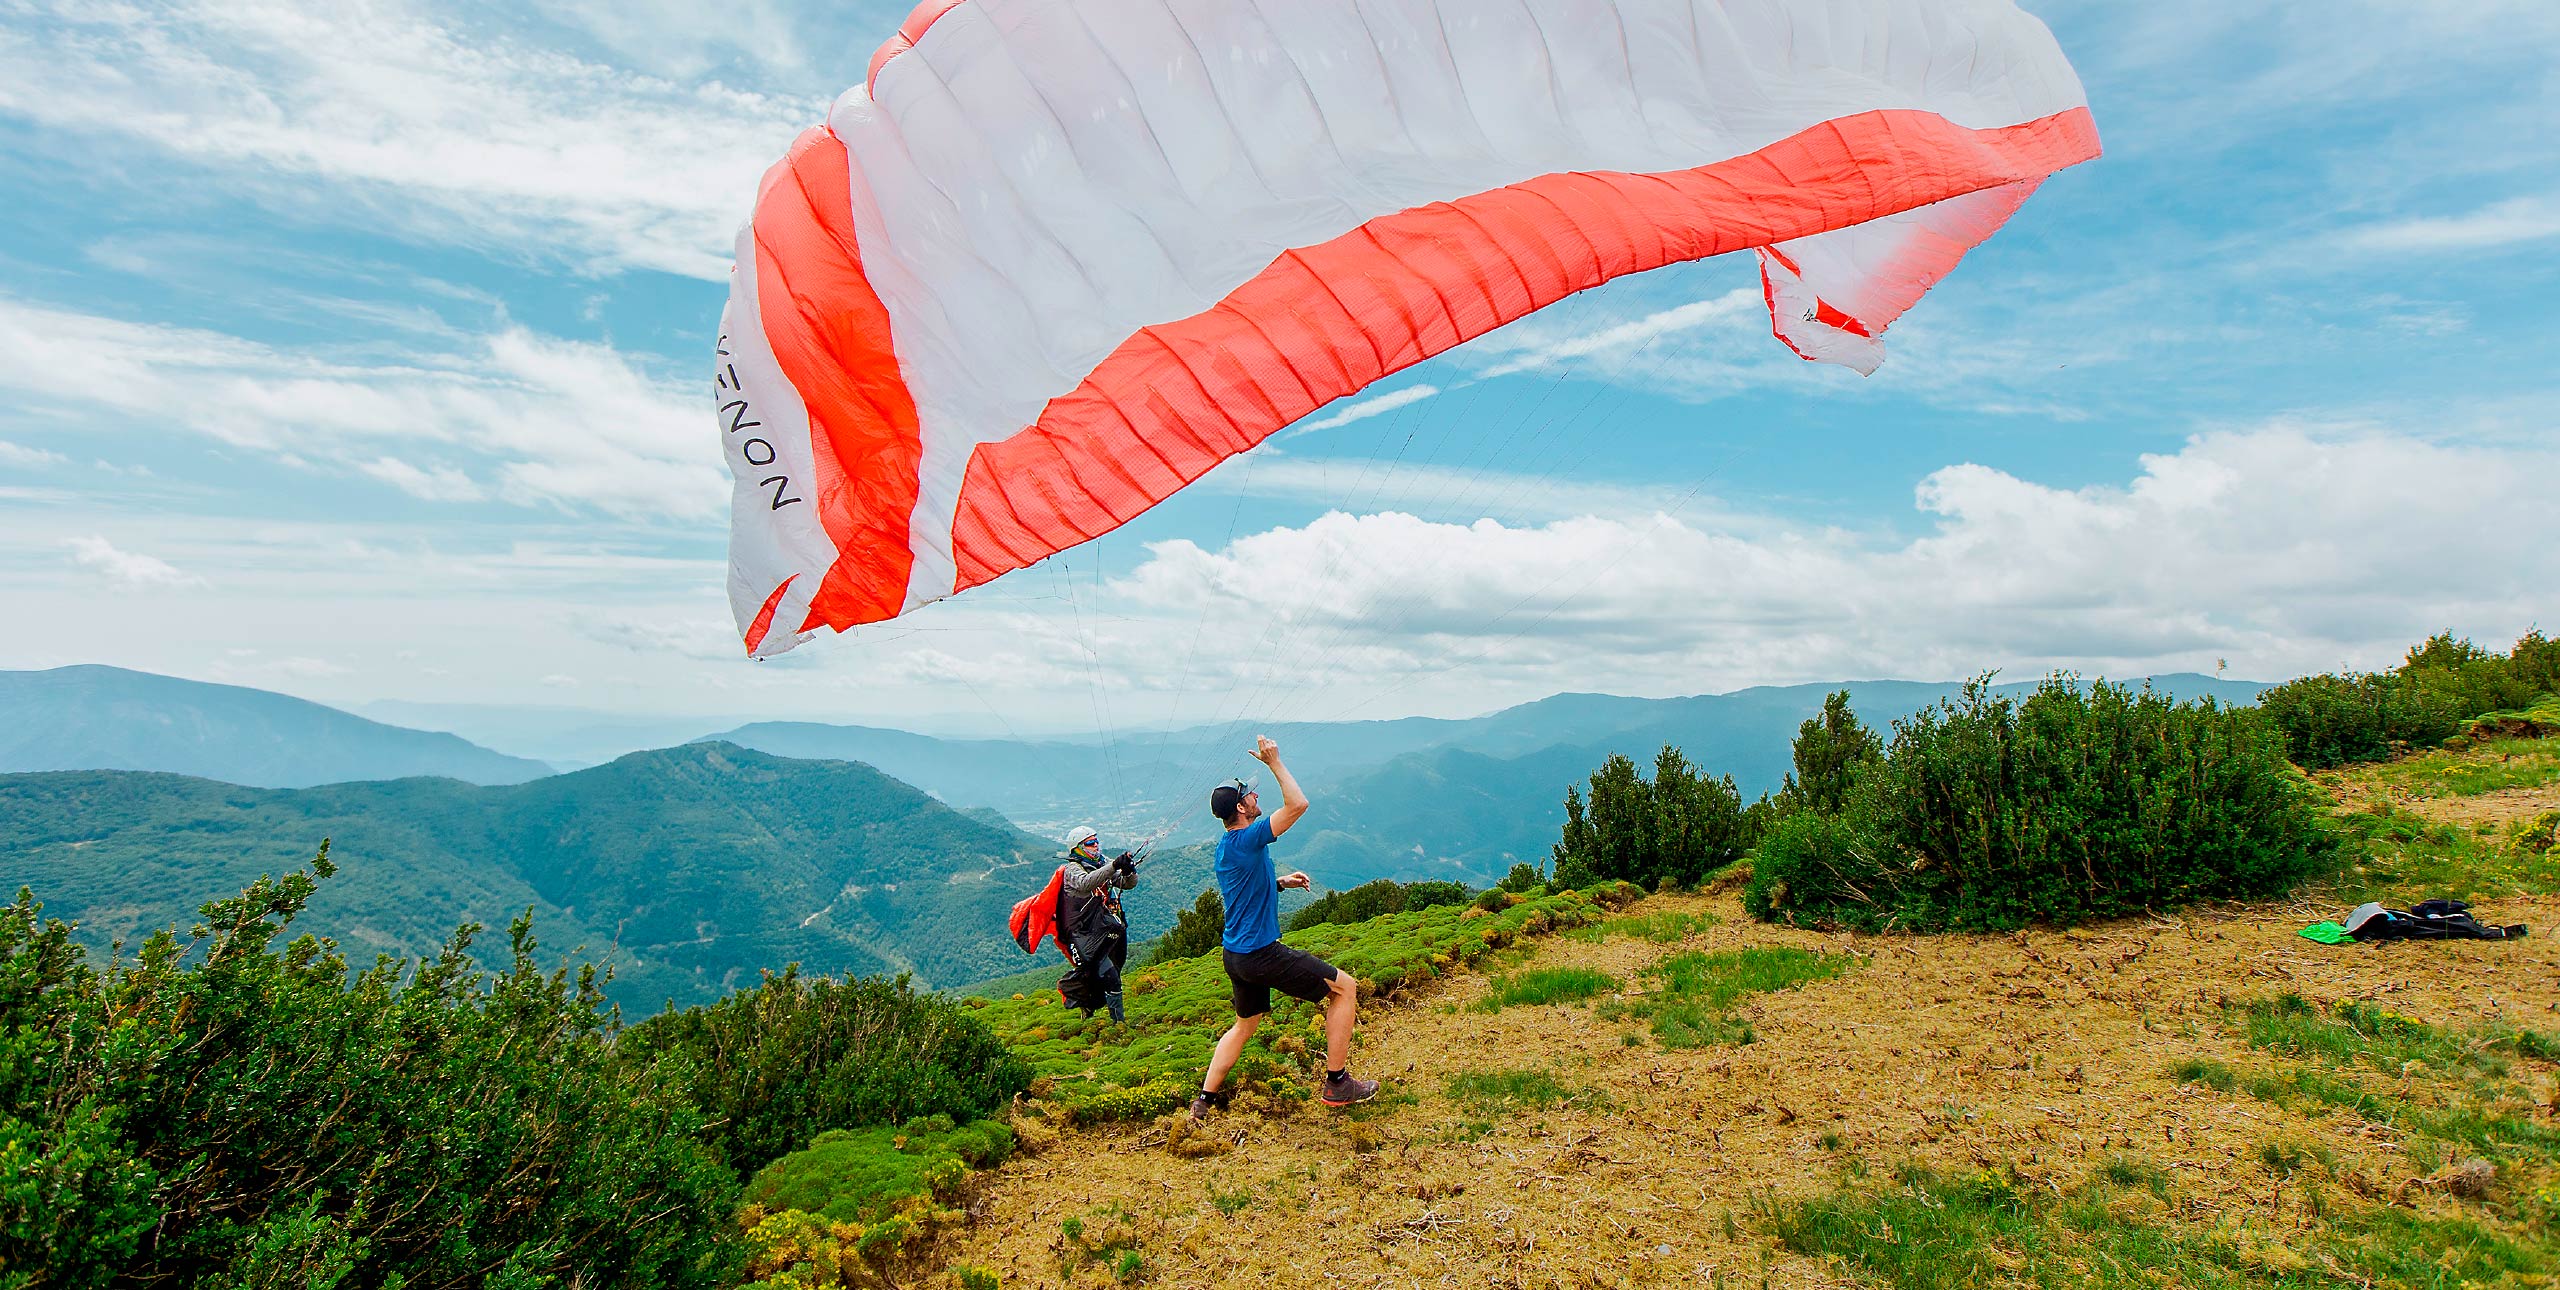
Marcus King flew the Apco Force II M with a Parajet Zenith Thor 190 Light
To stay up to date and read our reviews first, subscribe to Cross Country